


Specialized Crossfire stem torque settings
 05-11-23, 05:20 AM
#1
Specialized Crossfire stem torque settings
Hi, I am trying to find the torque settings for a Specialized Crossfire MTB steering stem. I'm not sure what year it was manufactured. The stem has 4 bolts that take a 4mm allen key to mount to the handelbars and 2 bolts that take a 5mm allen key to mount to the steering tube. The 4 bolts for the handlebars have 14.5nm written by the side of them but the two bolts for the steering tube clamp don't have anything. I have tried the Specialized site but find it very ambiguos. I would be grateful for any advice. Thanks Dave
 05-11-23, 05:28 AM
#2
Expired Member

[QUOTE=DPMDave;22886557] The 4 bolts for the handlebars have 14.5nm written by the side of them /QUOTE]Wow!
Likes For shelbyfv:
05-11-23, 12:32 PM
#3
Senior Member

Join Date: Jul 2015
Location: NW Oregon
Posts: 3,050
Bikes: !982 Trek 930R Custom, Diamondback ascent with SERIOUS updates, Fuji Team Pro CF and a '09 Comencal Meta 5.5
Liked 776 Times
in
562 Posts
so.. 10 ft/lb torque for a 4mm thread in an aluminum stem...?
seems kinda high.
i'm sure glad i never use a torque wrench on those screws!
BikeGremlin search...Home � Technical � Maintenance � Bicycle parts tightening torque (N⋅m) specifications This is a list of recommended bicycle parts tightening torques that have worked well for me so far. Briefly put, I�m answering the question: �how much should I tighten the bolts on my bicycle?�
Follow manufacturers� instruction � this list is primarily for my own reference and I�ll take no responsibility for any readers using it.
Table Of Contents (T.O.C.):
And why does it matter?
When we are pushing something, we can talk about force (
). However, tightening nuts and bolts requires some force applied in a circular direction, so there we are talking about torque.
I�ve made a video explaining what torque is:
Torque and power - basics explainedTorque and power explainedWhat happens when we are tightening a bolt? It stretches, acting as a kind of a rubber band, as it presses the joined parts together, creating what�s called a preload.
Too much preaload can damage a bolt, while too little preload can lead to a bolt loosening due to vibrations and other forces. In this video I�ve explained the bolted joints, and the importance of having an optimal preload and tightening torques:
Bolted connection and tightening torque basicsBolted joint connections: optimal preload and tightening torques explainedNow, when we are tightening a bolt, we can�t directly measure how much preload is created, but what we can measure is the tightening torque. We can feel the torque by hand, and a precise way to measure it is using torque wrenches.
In detail video about torque wrenches:
How to use a torque wrench and do you really need it?Torque wrenches � types, how they are used, and must you buy one?When we apply the same torque to a lubricated bolt, it will create more preload compared to a dry, non-lubricated bolt. In the article about mounting (anti-seize) pastes, I�ve explained how the use of mounting pastes affects the recommended tightening torque. All the tightening torques shown in this article are given for joints lubricated with mounting paste.
� T.O.C. �
The torque list is logically sorted by the parts of a bicycle where the respective components are located. All the values are given with a consideration that mounting (anti-seize) paste is used.
Follow manufacturers� instruction � this list is primarily for my own reference and I�ll take no responsibility for any readers using it.
The torques are provided in Newton-metres (N⋅m), and here�s an online N⋅m to inch-pound converter.
1 N⋅m = 8.851 x in-lb (N⋅m to inch-pounds)
1 N⋅m = 0.74 x ft-lb (N⋅m to foot-pounds)
1 ft-lb = 12 x in-lb (foot-pounds to inch-pounds)
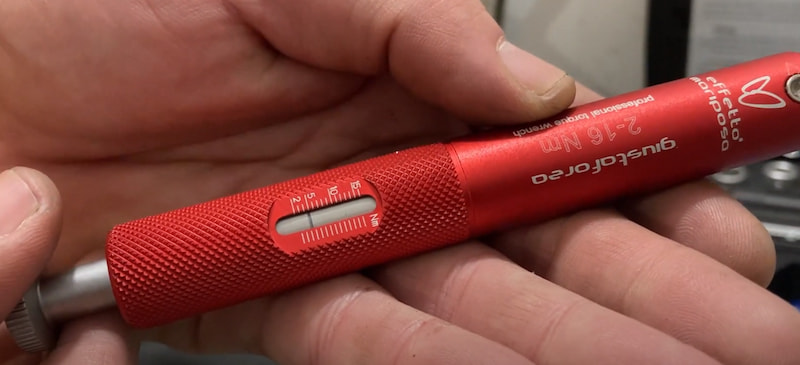 Adjusting a torque wrench to a specified torque (5 N⋅m in this case)� T.O.C. �
Component (part)N⋅mThreaded fork headset locknut15Quill-stem fixing bolt (on threaded forks)16Ahead (threadless) stem steering column pinch bolts *5 *Stem to handlebars interface with 4 bolts *5 *Stem to handlebars interface with 1 or 2 bolts *14 *Seatpost pinch bolt *4 *Saddle to seatpost mount *16 *
"4 bolt stem to bar clamp screws.. 5 nm...."
etc.
i bet you mis-typed that "14.5 nm" figure... or someone did.... that's for more like a 6 mm thread, two bolt, bar clamp.
tighten each of them a bit at a time, and evenly.. this reduces the chance of cracking the clamp plate... M/C bar clamps specify that a gap be maintained between the two surfaces involved... any uneveness should be a bias towards the front (top for vertical clamp splits) being slightly more open. I usually set bicycles up with a fairly even gap, top to bottom....or front to back, in the case of top loader BMX stems..
seems kinda high.
i'm sure glad i never use a torque wrench on those screws!
BikeGremlin search...Home � Technical � Maintenance � Bicycle parts tightening torque (N⋅m) specifications
Bicycle parts tightening torque (N⋅m) specifications
09/10/2022 by Relja NovovićThis is a list of recommended bicycle parts tightening torques that have worked well for me so far. Briefly put, I�m answering the question: �how much should I tighten the bolts on my bicycle?�Follow manufacturers� instruction � this list is primarily for my own reference and I�ll take no responsibility for any readers using it.
Table Of Contents (T.O.C.):
- What is a tightening torque?
- Recommended bicycle part tightening torques
2.1. Frame, seatposts, saddles, stems
2.2. Handlebars and levers
2.3. Wheels, cassettes, hubs
2.4. Brakes
2.5. Derailleurs
2.6. Bottom brackets
2.7. Pedals, cranks, front chainrings
1. What is a tightening torque?
And why does it matter?When we are pushing something, we can talk about force (
I�ve made a video explaining what torque is:
Torque and power - basics explainedTorque and power explainedWhat happens when we are tightening a bolt? It stretches, acting as a kind of a rubber band, as it presses the joined parts together, creating what�s called a preload.
Too much preaload can damage a bolt, while too little preload can lead to a bolt loosening due to vibrations and other forces. In this video I�ve explained the bolted joints, and the importance of having an optimal preload and tightening torques:
Bolted connection and tightening torque basicsBolted joint connections: optimal preload and tightening torques explainedNow, when we are tightening a bolt, we can�t directly measure how much preload is created, but what we can measure is the tightening torque. We can feel the torque by hand, and a precise way to measure it is using torque wrenches.
In detail video about torque wrenches:
How to use a torque wrench and do you really need it?Torque wrenches � types, how they are used, and must you buy one?When we apply the same torque to a lubricated bolt, it will create more preload compared to a dry, non-lubricated bolt. In the article about mounting (anti-seize) pastes, I�ve explained how the use of mounting pastes affects the recommended tightening torque. All the tightening torques shown in this article are given for joints lubricated with mounting paste.
� T.O.C. �
2. Recommended tightening torque list
The torque list is logically sorted by the parts of a bicycle where the respective components are located. All the values are given with a consideration that mounting (anti-seize) paste is used.Follow manufacturers� instruction � this list is primarily for my own reference and I�ll take no responsibility for any readers using it.
The torques are provided in Newton-metres (N⋅m), and here�s an online N⋅m to inch-pound converter.
1 N⋅m = 8.851 x in-lb (N⋅m to inch-pounds)
1 N⋅m = 0.74 x ft-lb (N⋅m to foot-pounds)
1 ft-lb = 12 x in-lb (foot-pounds to inch-pounds)
Adjusting a torque wrench to a specified torque (5 N⋅m in this case)� T.O.C. �
2.1. Frame, seatposts, saddles, stems
Component (part)N⋅mThreaded fork headset locknut15Quill-stem fixing bolt (on threaded forks)16Ahead (threadless) stem steering column pinch bolts *5 *Stem to handlebars interface with 4 bolts *5 *Stem to handlebars interface with 1 or 2 bolts *14 *Seatpost pinch bolt *4 *Saddle to seatpost mount *16 *"4 bolt stem to bar clamp screws.. 5 nm...."
etc.
i bet you mis-typed that "14.5 nm" figure... or someone did.... that's for more like a 6 mm thread, two bolt, bar clamp.
tighten each of them a bit at a time, and evenly.. this reduces the chance of cracking the clamp plate... M/C bar clamps specify that a gap be maintained between the two surfaces involved... any uneveness should be a bias towards the front (top for vertical clamp splits) being slightly more open. I usually set bicycles up with a fairly even gap, top to bottom....or front to back, in the case of top loader BMX stems..
Last edited by maddog34; 05-11-23 at 12:44 PM.
05-11-23, 02:06 PM
#4

Senior Member
Join Date: Feb 2012
Location: Rochester, NY
Posts: 18,197
Bikes: Stewart S&S coupled sport tourer, Stewart Sunday light, Stewart Commuting, Stewart Touring, Co Motion Tandem, Stewart 3-Spd, Stewart Track, Fuji Finest, Mongoose Tomac ATB, GT Bravado ATB, JCP Folder, Stewart 650B ATB
Liked 4,001 Times
in
2,379 Posts
I'll bet the stem/bar clamp bolts that the OP mentions are a M5 thread. The 4mm reference is only the wrench fit. The 5mm stem/steerer clamp bolts are likely M6 threads. 14.5nms would be a lot for a M5 thread and for a M6 one about as tight as one would want. Abdy
__________________
AndrewRStewart
AndrewRStewart
 05-12-23, 04:15 PM
#5
Thanks very much for your reply. This information is great.
I'm feeling rather stupid as I have had a closer look at the stem and the 14.5 was actually [4.5, ie the 1 was an opening bracket.
Apologies for wasting your time and thanks again for the information
I'm feeling rather stupid as I have had a closer look at the stem and the 14.5 was actually [4.5, ie the 1 was an opening bracket.
Apologies for wasting your time and thanks again for the information
Likes For DPMDave:
